Tutorial (Make a simple cubic ball & stick model)
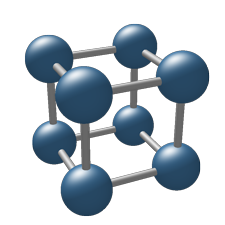
Let's compose a simple cubic structure model step by step.
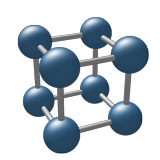
1. Create a new model
Move to "Home" tab-page on the sidebar and choose "Create a new model" in the function menu. An empty model is prepared. Click "Rename" and enter the model name "Simple Cubic".
2. Put the first ball item
Move to "Ball" tab-page and choose "Append" in the function menu. As a popup appears, confirm "0 0 0" is entered in "Position" text-box and click "Apply". Then you'll see the first ball put in the 3D View.
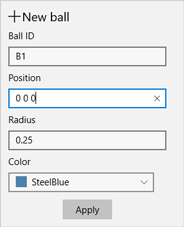
2. Append more ball items
Repeat ball-appending process for positions "0 1 0", "1 0 0" and "1 1 0".

3. Duplicate ball items
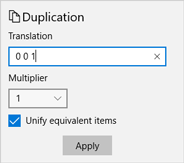
You need to append four more ball items to complete cubic corners. Although it is possible to append one by one manually as above, but make it done at once by "Duplicate" function this time. Select all the ball items in the list and choose "Duplicate" in the function menu. Enter "0 0 1" to "Translation" and click "Apply".

4. Draw sticks
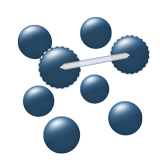
Next, let's append sticks to the model. Turn on "Edit" toggle button to enter Edit Mode. In the Edit Mode, you can make a stick item directly by pointer-dragging one ball to another on 3D View*. By connecting corner balls to their neighbors, draw all twelve sticks required to compose a cube. Turn off the "Edit" toggle button when finished.
*When you need to rotate the model during Edit Mode, use two points swiping (or mouse dragging with middle button down).
5. Adjust model offset
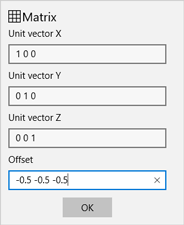
Cubic structure is made up almost all successfully. Now, finish it by adjusting model offset so that the model can rotate symmetrically around its body center "0.5 0.5 0.5" instead of current "0 0 0". Choose "Matrix" in the function menu on the "Ball" tab-page. Enter "-0.5 -0.5 -0.5" to "Offset" text-box and click "OK".
6. Done.
Move to "Home" tab-page and try exporting graphics in various format. It would be cool to post the best shot picture to your favorite social media to astonish your friends and/or colleagues. Don't forget to attach a nice comment to praise or otherwise to recommend Ball & Stick app then. Thanks in advance.